A summary of the conventions used in film trailers:
Logos of the institutions/production companies.
names of the cast(mainly leads are (highlighted)
storyline synopsis
linear narrative structure
release date
music (diagetic and non diagetic)
Wide variety of edits such as montage/slow/fast editing
director/producer listed
graphic title sequences (captions)
film certificate
Monday, 1 February 2010
Main product
This is my finished full length film trailer (3:09 minutes approx) Here I will critically analyze my own piece of work.
The first clip is of my course details for the examiner, this is not part of the actual trailer. The start of my trailer features a ratings card which I acquired from http://re-run.com/article/free-rating-card-artwork. This is a conventional of film trailers to include a film ratings card. I used the keybar on the timeline to fade this into my logo.
The production logo of the film is then displayed, this is the same logo that I created and used in my film poster, this is an example of intersexuality. To make my logo stand out more and give a bigger impact I used a matrox effect called “spheres” to give an initial effect to the logo, I then customized the effect further in the custom effect window. This then gave it a 3d like quality which I think is very effective. An oversight in the creation of my logo initially caused problems with the text featured on the logo as it was of a dark colour on a dark background, this was remedied quickly by choosing a suitable text overlay and font provided in Adobe Premier Pro, this gave the side effect of a shadowy secondary text in the logo which surprisingly works quite well.
The trailer truly begins now, with text fading in the bottom left hand corner, setting the scene for the trailers story to begin. The text was positioned in such a way to be almost like a security camera or a hand held video cameras recording details overlain on the imagery.
The first scene is then faded in with the camera facing close to the ground with a slow rise as to give the impression of waking up/ recovering or looking up. The music (non-diagetic) then begins as this occurs. The shot then uses a combination of depth of field and the matrox effects soft tone and blur to focus on the hand; this gives the viewer a sense of displacement or dizziness with the goal of it simulating someone coming in and out of consciousness. As the camera pans up the actors hand twitches, indicating he is coming to. The camera then zooms in to the characters face and after a moment, he awakens with a start, this is then immediately followed a flash back. To create this flashback effect I had to position two clips together in the time line with a space between each and then put a blank white clip in-between, once this had been done I lowered the key bar of each of the two clips into the plain white one, thus giving a flashback effect.
My trailer initially was a match on action piece with quick edits, in this final production I have changed things considerably, it now has slow cuts with most having a fade done in time to the music.
The trailer also makes use of symmetrical editing, to have two different settings that eventually become one.
The title clips used in my trailer follow same style throughout with the sentence fading in first followed by the key word in red which then lingers after the rest of the title has faded away, this I feel helps enforce the genre of my trailer, sending the information clearly and visually to the audience.
This trailer is a hybrid of sorts that challenges conventional film trailers and draws inspiration from game trailers and music videos as well as existing film trailers. The reasoning behind this is that when considering how I could make it realistic and effective, I came to the conclusion that with what I had at hand, I would be limited in what I could do, this prompted me to research into games of a similar genre as they had to make their products realistic, while still being fictional. This research can be seen in the trailer for example the stance of my main character, his poses, various shots of the camera and special effects all combine in a similar way that games use. Examples of this are at 1:52, 2:02 and 2:08 but other examples are featured throughout.
At 1:08 red containers can be seen as part of the setting, this was intentionally done as; from my research this colour helps imply danger and violence and would work with my title sections well. I also made use of a “slow mo” in the scene to help emphasise his despair and struggle.
I had taken inspiration from cloverfield for a first person view of the attacker going after the main character, this provides realism to the scenes and helps the audience identify the position the main character is in, from the eyes of the enemy so to speak. At 1:23 this is used for an effective cut to a title.
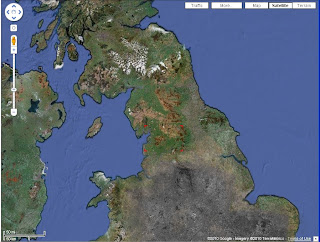
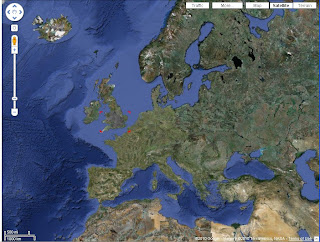
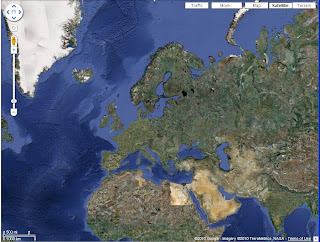
The computer scene I found a challenge as I needed to create visuals to show the situation of the nation. Leading up to this scene I used the blur video effect to show him recovering and still in a daze. The visuals I created by taking images of England from Google earth, I did this by gradually zooming in and then using the printscreen button to take a snapshot of its current position. I then sent these images to Photoshop CS3 where I cropped them and then heavily edited them to appear as if England had been gravely destroyed in part. I chose to retain some of the google tools on the image as this would be recognized by the audience and thus be verysimilitude. I used a dissolve effect to transition each image in a futuristic way.
At 1:47 the symmetrical editing ends in a transition from the scientist to the survivor. Another notable transition is at 2:04 where the action runs into each other seamlessly.
The title is Exodus; this title was chosen due to the storyline/plot. Exodus means flight or departure on a mass scale so I wanted to portray the main character travelling the 2:09 to 2:26 time frame shows this to a good extent showing a wide array of shots of him walking, running and climbing.
I have used special effects while editing my trailer as I have mentioned but two of the more notable ones I have used for added effect is that of the split screen effect and the lens flare effect. The split screen effect can be found at 2:26 and gives multiple perspectives of the character in action. The lens flare was customized heavily for my production and was used for a different objective then it was intended for, I wanted to give the main characters gun a muzzle flash for some of the action scenes as to make it more interesting for the viewer, this was accomplished by transforming the neon pulse lens flare and positioning it next to the gun in a portion of a clip that was cut from the rest of the same clip. By removing the flare pulses it left a brief flash of light in the effect of a laser that had the desired effect.
The ending of the trailer features a first person perspective of someone chasing the main character and getting shot down, with the impression of them passing out. The last scene uses time lapse to have the character fade out as he walks a good distance into the blizzard which shows a sense of movement. The last title features the films name and an enigma title, “It begins 10.10.10”. The music also ends to the same rhythm and pace of the last scenes.
Finally the billing block is shown that I created, before that to fades out.
Character Development.
The way my main character has been portrayed has been in two main forms.
The scientist
Here my character was shown in a lab coat and features glasses and lighter everyday type of clothing, this was an intentional choice as I wanted it to be a stark contrast with how he first appears to when he is out in the open. This also fit the mise en scene of a lab space.
The Survivor.
I wanted him to look bulky, ready for action and equiped to survive, this is prominant when the film trailer transitions between the two costumes. He features urban khaki leggings and top, heavy boots, gas goggles scarf/gloves and gun. This helps the audience see how conditions and circumstances change and how he adapts to survive.
This was my short feature length trailer. It uses clips from the main film trailer but with much quicker edits and music to match. It also shows alternate title sections and scenes not used in the main trailer. Unlike the main trailer this one features sound effects such as a nuclear siren at the beginning and a gunshot blast at the end to provide an edgy action feel to the production. The special effects used in this was the customized lens flare for the two gunshots.
This is the original raw footage showing the match on action storyline that was originally intended for my trailer before the changes and editing took place.

This is the billing block I created in Photoshop CS3 using the text tool, and the transformation tools to resize my logo and secondary texts.
Free rating block from : http://re-run.com/article/free-rating-card-artwork.


Drafts
For a portion of my film trailer I needed to show destruction of a massive scale, this was for the computer scene in the lab.
I used Google Earth to aquire multiple shots of the United Kingdom, I did this by print screening at intervals as I zoomed in, I made sure to keep two red squares visible as I zoomed in to give it an effect of placement for the scientist. This gives it a sence of continuity.
The images I then put in Photoshop and cropped them to be the same, I made the desision to retain the google interface as this would give it some realism to the audience. Once they had been cropped I edited the land mass of lower England to look like it had been destroyed. This was done via colour hues and brushes to alter and distort the original picture. Every picture was done this way.


Logo
I had been set the task of designing and creating a logo for my fictional film company for my main task and ancillary tasks.
Once they had been uploaded to my computer I sent the images to Photoshop and cut each letter I needed and placed them on a PNG background so that they could be placed, like the robot image, seamlessly on any image or film.
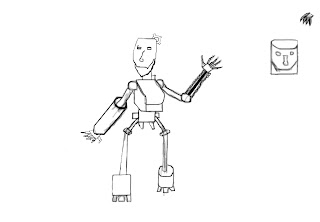
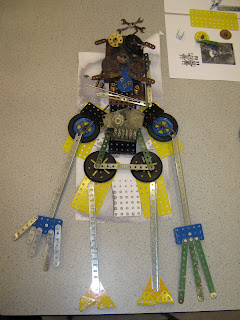
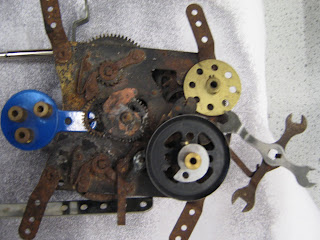
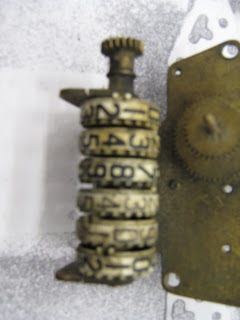
Using my drafts as a guideline I decided to build a logo from scratch, from the font to the image. To create the image I went to the art workshop at Wyke College and gathered various materials to create a robot. Items in its construction ranged from machine parts to old antiques. I arranged these parts into the form of a robot and then used my digital camera to take photos of it.

Shown below is my finished billboard which I will use in the film. It features my logo, production staff names and production company name.

This was my original film company name and logo. I used my custom text that I created with a number of filters in photoshop to give it a striking but simple effect.


These are two graphic designs I created as drafts for a possible logo. I created these from scratch using photoshop.
I decided to try out a range of ideas to give me more options for the final material to use. A logo is meant to be easily recognizable and iconic; this allows the production company to be identified easily.

Looking at examples of existing logos I have found that styles vary, and give the company a distinct face. From my drafts I plan to narrow down my ideas and designs and incorporate them into my final logo.
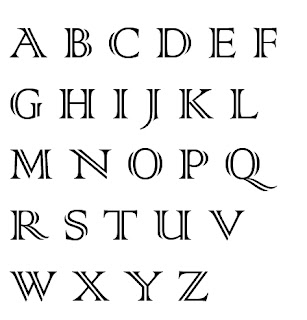
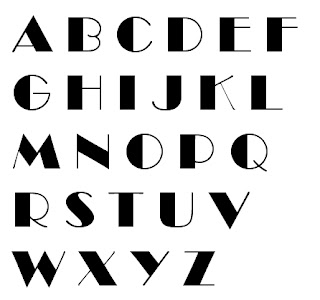
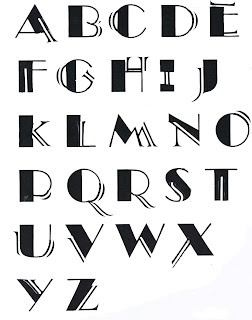
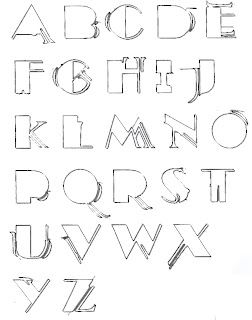
For the production company name text, I created my own font. This was achieved by selecting two fonts from Microsoft word then printing off all the words of each in an alphabet. Now that I had both alphabets I carefully cut them out with a penknife and cut them up to merge into both letters. When they had a suitable unique look I glued them together and scanned it.
For the production company name text, I created my own font. This was achieved by selecting two fonts from Microsoft word then printing off all the words of each in an alphabet. Now that I had both alphabets I carefully cut them out with a penknife and cut them up to merge into both letters. When they had a suitable unique look I glued them together and scanned it.


Once they had been uploaded to my computer I sent the images to Photoshop and cut each letter I needed and placed them on a PNG background so that they could be placed, like the robot image, seamlessly on any image or film.

Using my drafts as a guideline I decided to build a logo from scratch, from the font to the image. To create the image I went to the art workshop at Wyke College and gathered various materials to create a robot. Items in its construction ranged from machine parts to old antiques. I arranged these parts into the form of a robot and then used my digital camera to take photos of it.


Once this had been done, I uploaded it onto my computer for editing. Beforehand I had placed my robot structure on white card; this made it easy to cut away the background in Photoshop. Once this had been done I applied a filter to the image, this gave it a very metallic look and helped it stand out.
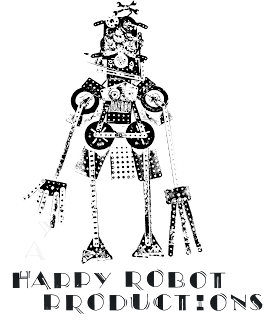

After the filter had been applied I converted the background image to be PNG, this made the image free to be placed on any image or film seamlessly.
While creating my Logo in photoshop I had the idea to create a film billboard at the same time, as my Logo would be on this to.
While creating my Logo in photoshop I had the idea to create a film billboard at the same time, as my Logo would be on this to.
I looked at examples of film billboards (The example shown below is from the film stardust) this gave me a guildine on what the format of a filmboard should be and how I should create mine appropriatly.
Shown below is my finished billboard which I will use in the film. It features my logo, production staff names and production company name.


This was my original film company name and logo. I used my custom text that I created with a number of filters in photoshop to give it a striking but simple effect.


These are two graphic designs I created as drafts for a possible logo. I created these from scratch using photoshop.
Shooting schedule and Health and Safety Assessment
The shooting schedule - footage gathering for main task.
Monday 28th December - Daniel Armitage and George Shield-Lout
College laboratory and college grounds. 11 am - 1pm
Wold golf course/ Cottingham fields 2pm - 4pm
Tuesday 29th December - Daniel Armitage and George Shield-Lout
Willerby warehouses/playing fields 12pm-4pm
17th March - George Shield-Lout
College laboratory re-shoot 4pm-5pm
Health and Safety Assessment
During filming at the college laboratory and grounds I asked permission and supervision for safe use of the laboratory, this meant that I had a qualified scientist prepare the room and clear it of harmfull objects, as well as supervise usage of the lab during filming. I also checked me and my casts name, buisness at the college and details into the college register at the help desk, so they had a log of where me and my cast where exactly at all times in case of emergency.
While on the golf course and playing fields I made sure that the area was clear of people for the filming area so that my actor and equipment wouldnt get in the way and cause a hazard and this also meant safty for my cast.
At the warehouses I made sure my actor had steel capped boots on and protective clothing, as there was a remote possability of glass and debris hidden in the surrounding terrain.
All equipment was checked to meet saftey standards before every use and was approved by a qualified technician before filming.
Cast List
Originally the cast list was going to be made up of a main character with a number of people "mob acting" as a form of sterotypical zombie.
This proved to be difficult logistically as many couldnt get to a certain place at a certain time, leading to the cast being scattered.
I then proceeded to make the descision that I would remove the majority of the cast and instead focus on just the main character.
The main character is a friend of mine called George Shield-Lout, I had picked him out due to his apperance, he could look grim and determined in the manner I wanted to portray in my trailer.
I used myself for the scenes in which an afflicted human was attacking the main character, this was usually done in first person view or with the camera set up un manned.
Location list
By looking at the examples of media text I want to base my film trailor on, I came to the conclusion that I needed to have three prominant areas. The first had to be a derelict building(s) the second had to be a fairly wooded area and the last had to be an obscure setting to juxtapose the trailor, this would make the film trailor interesting.
My original idea of an area was to be some old fish docks near the River Humber, this would have allowed me to have an area free of people that looked abandoned and desolate. However with the weather changing to heavy snow for a brief period, I took advantage of the situation.
I have taken inspiration from exsisting media texts such Imogen Heap's Canvas video to formulate an idea of a journey within the trailor. Combining this with other texts, I hope to make an original trailor with the feel of other such media of its genre.
I had taken a weekend to scout out prospective areas for my filming, these are the four areas that met the parameters of the locations needed.
The playing fields would give me in the right weather conditions a bleak rugged setting in which to film the traveling sequences of my film trailor.
The area is quite diverse in terrain and would give me options on what type of scene I would wish to shoot, this would be for obscure up close chase scenes or exploring.
The large buildings there could also provide interesting ascpects to shoot.
My original idea of an area was to be some old fish docks near the River Humber, this would have allowed me to have an area free of people that looked abandoned and desolate. However with the weather changing to heavy snow for a brief period, I took advantage of the situation.
I have taken inspiration from exsisting media texts such Imogen Heap's Canvas video to formulate an idea of a journey within the trailor. Combining this with other texts, I hope to make an original trailor with the feel of other such media of its genre.
I had taken a weekend to scout out prospective areas for my filming, these are the four areas that met the parameters of the locations needed.
- Willerby warehouses/playing fields
The playing fields would give me in the right weather conditions a bleak rugged setting in which to film the traveling sequences of my film trailor.
- Wold Road Golf Course
The area is quite diverse in terrain and would give me options on what type of scene I would wish to shoot, this would be for obscure up close chase scenes or exploring.
- Wyke College
The large buildings there could also provide interesting ascpects to shoot.
- Cottingham fields
Prop list
Before I start my filming I need to figure out exactly what equipment I need in order to film successfully.
A full list is below:
Filming equipment:
A full list is below:
Filming equipment:
- Tripod
- Video Camera
- Tape
- Cleaning cloth for lens
- Camera bag for transportation.
Character gear:
- Goggles
- Urban khaki coat
- Urban Khaki leggings
- Hard weather gloves
- Steel capped boots
- Toy BB gun
- Dark scarf
Animatric
This is my animatric, I created this with the purpose of getting an idea of what the trailer could look like. I did this by taking images from my storyboard and redrawing them on cards, I then scanned these cards onto my computer where I then placed them into photoshop to be cropped.
Once this was done I took my still images to Windows Movie Maker and lined them up, I then saved it as a movie file and uploaded it to blogger.
Note:Music was not decided at this point.
Audio
This soundtrack has a very dark brooding feel, with a thumping deep beat to it, which has the possibility to help build up momentum and still retain the grim apocolpyptic feel of the trailer.
Lyrics:
You’ve stripped me down, the layers fall like rain
It’s over now, just innocence and instinct still remain
You watched me while I slowly disappeared
I reached for you to save me; you were frozen in your fear
Take it all away[x4]
Circling the pain inside my soul
I reached inside your silence to steal what you won’t show
I tried to find the answers in my fears
But what was found is lost again as soon as it appeared
Take it all away [x4]
I’m breaking; I can’t do this on my own
Can you hear me screaming out, am I all alone?
You take away [x10]
The lyrics work with the trailer in terms of setting for example "It’s over now, just innocence and instinct still remain" and "Can you hear me screaming out, am I all alone?" These work well with the main character as he is surviving on instinct and he dosent know if anyone else survived.Narrative equilibrium could be established through the use of slower paced editing with this song.
This composition is very different to the first soundtrack as it has a fast pace to it, with an epic feel, much like some of the trailers I analysed such as 2010 and I am Legend, this song would allow for fast pace edits and juxtaposed edits.
This song I retained from the game trailer I analysed, it gives a steady beat and would allow for a mixture of edits, it almost tells a story in its own right, its happy and sad at the same time, the lyrics reflect on the character as he searches and survives and finds the sick humans that "look right through him".
Subscribe to:
Comments (Atom)